Location Management
This is a step-by-step instruction on how to add new locations (restaurants/stores) to your merchant account. An easy and comfortable way to configure your stores, by adding all the relevant information, customizing the navigation menus, overall design and integrating them with other systems and applications.
Adding Merchant Account and Locations#
The first step is to Create your merchant account - this is a high-level name of your restaurant Group.
- Add Business Name/ Description - add the name of your restaurant group and a short description (for internal use only).
- Click on the blue 'Save' button on the top right corner.

Next you can add one or more stores/restaurants.
- Go to the 'Locations' tab on the left side menu;
- Click on 'Add' in the top right corner;

You also have the possibility to apply the filter and select All (Default), Only Displayed or Only Hidden locations, and to use the Search field to find the store/restaurant you require.
Store Info#
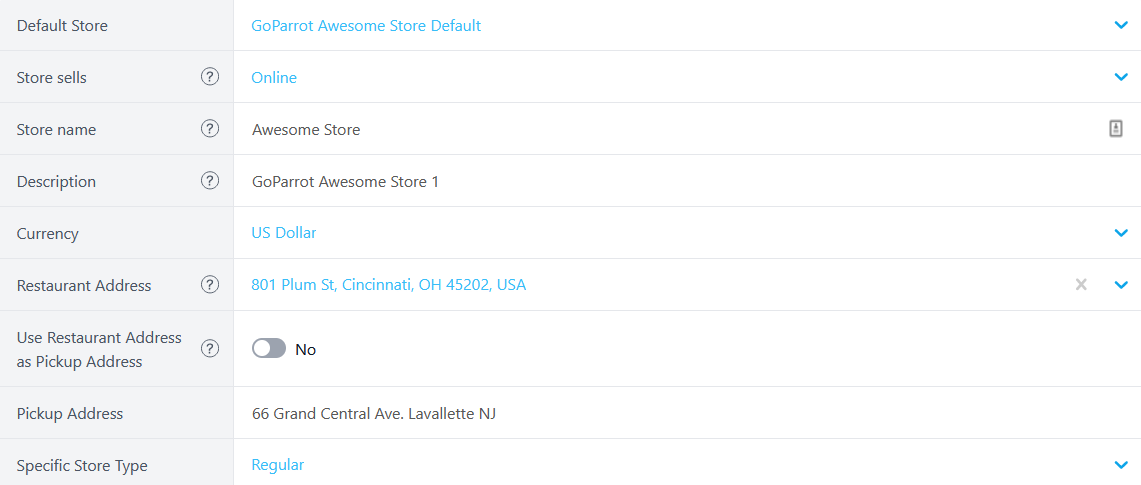
- Select if your store operates only online, if you have a physical store, or both. Add your Store Name, Description, Currency, Restaurant Address and pick 'Yes' or 'No' if you want to Use Restaurant Address as Pickup Address. In case you have chosen 'No', add an address for customers to pickup their orders. From the drop-down list, select a Specific Store Type (i.e, Regular, Catering, Holidays, Special, Grocery, etc.) By default, all stores are displayed as 'Regular'.
- Add your email address and telephone number.
- Add the contacts of your Manager who will receive system alerts and notifications on new orders.

Click 'Save' in the right corner of your screen.
Store Styling#
On this page you can choose and customize various design decisions for your online store, including color schemes, fonts, spacing, icons, banners, social media links, etc.
1. Header
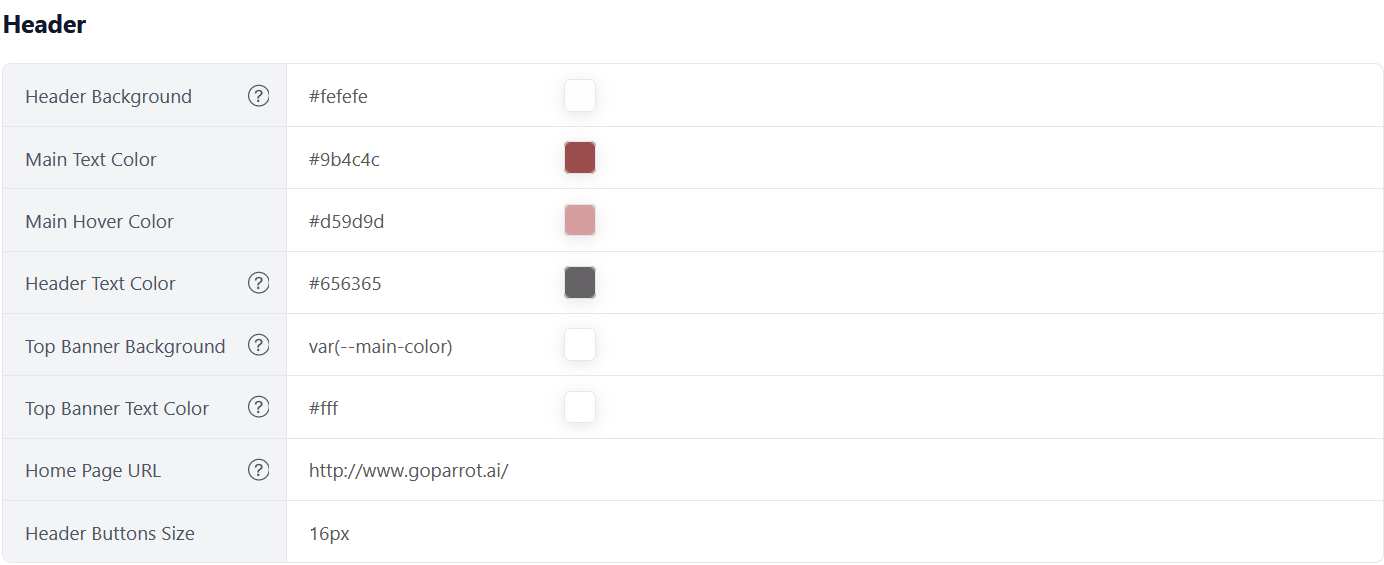
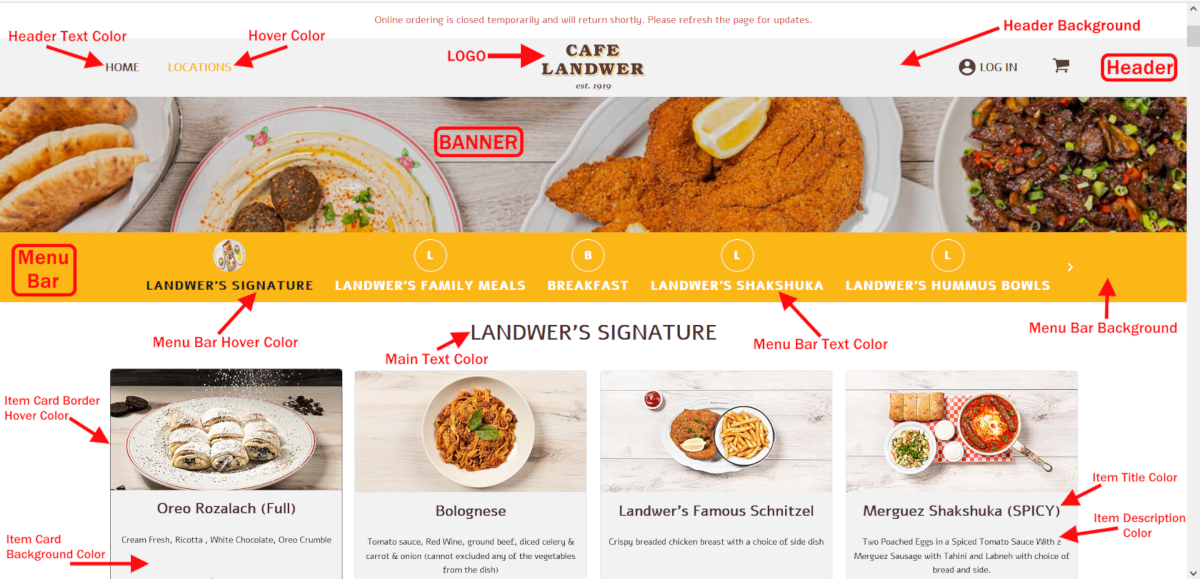
Header Background – set the background color of your header bar, by applying a hex color code or by using the color picker.
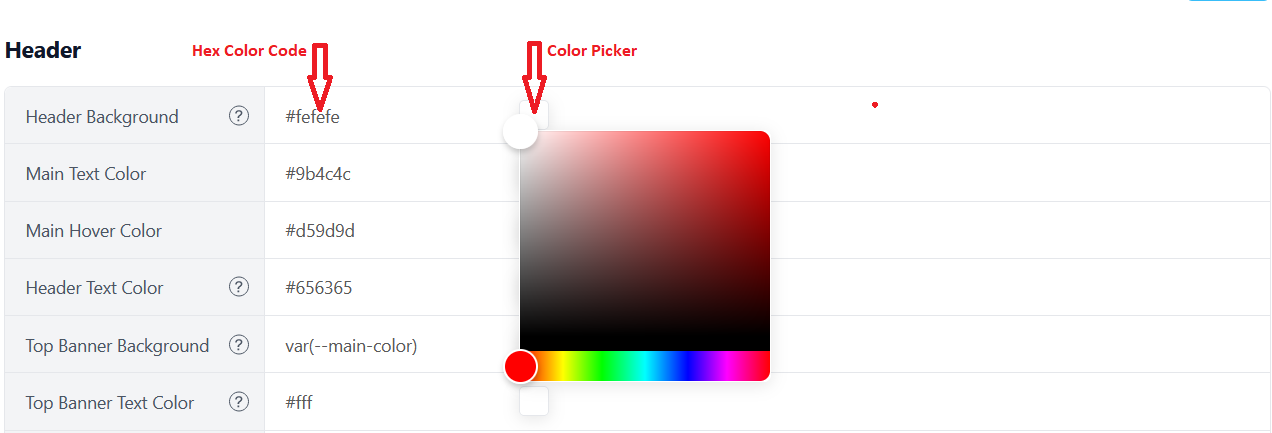
Main Text Color - set the color of the main text on your website. Take into account that it is recommended to have a good contrast between the background and the text, for better readability.
Main Hover Color - set the color that the text changes to when the mouse is over the link.
Header Text Color – set the color of your text on header bar.
Top Banner Background – set the background color of the banner placed in the top section of your web page.
Top Banner Text Color - set the color of your text on the banner placed in the top section of your web page.
Home Page URL – set your website address – the domain name that identifies you or your company on the Internet.
Header Buttons Size – set the size of the icon or text-based Buttons in the header of your page. The size is added manually, in pixels.
2. Custom Button in Header
Set the basic values for your custom button in the top section of your web page. Write the relevant title and URL, select title color, hover color and font size.

3. Logo
Upload your logo image, add the link of the web page where your logo will redirect (usually it’s your website address) and set the logo height, manually, in pixels.

4. Favicon
Upload images that will be displayed as favicons on your website. They are displayed at the top of your browser tab bar when you open your website. You can upload three favicons, but make sure that you name and size them exactly as required: favicon-16x16.png (16x16px), favicon-32x32.png (32x32px), apple-touch-icon.png (180x180px).
![]()
5. Banner
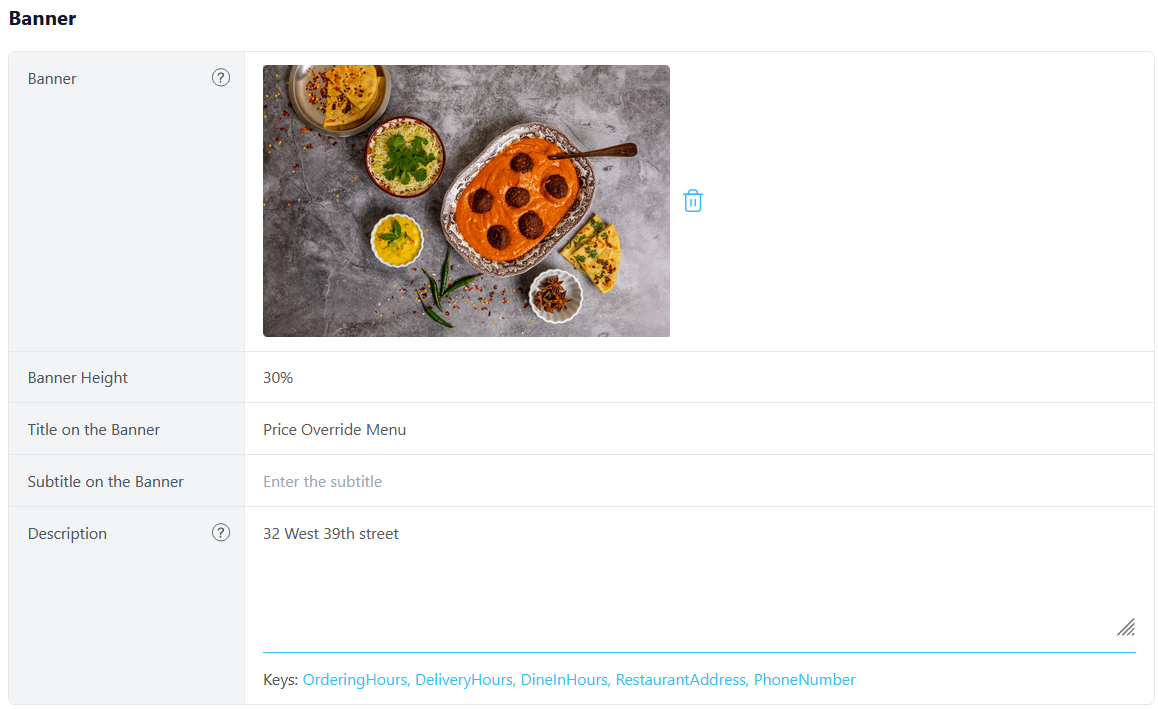
Upload your banner (recommended image size: 2800x720px), set banner height in precents, write its title and subtitle in the required fields.
Add a description by using predefined variables (e.g store address, business hours) to display important store information to your customers. The variables are dynamic and will change according to their settings in the dashboard. You can also add custom text, if needed.
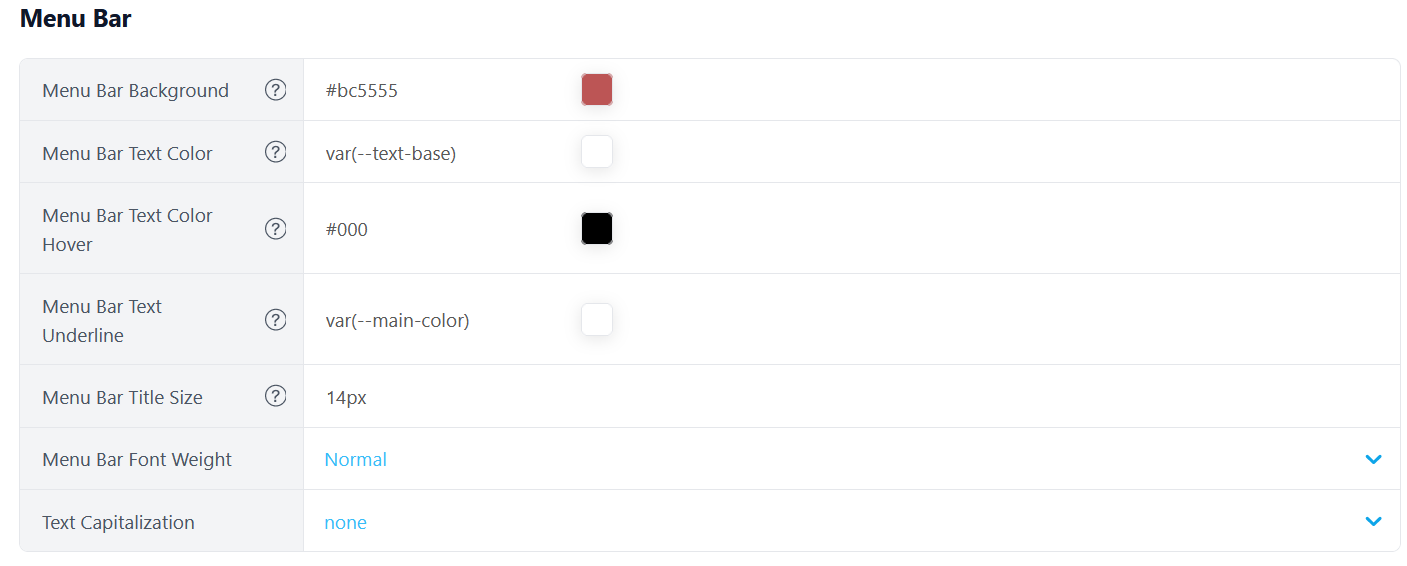
6. Menu Bar
Menu Bar Background - set the background color of your menu bar, by applying a hex color code or by using the color picker.
Menu Bar Text Color – set the color of your text on your navigation bar. Take into account that it is recommended to have a good contrast between the background and the text, for better readability.
Menu Bar Text Color Hover – set the color of the category when you click on it.
Menu Bar Text Underline – set the color that will underline the category in the menu navigation bar, when you click on it.
Menu Bar Title Size – set the text size for categories in the menu navigation bar (in pixels).
Menu Bar Font Weight – set from the drop-down list the font weight (e.g Thin, Light, Medium, Bold, etc).
Text Capitalization – set from the drop-down list how your text will look (lowercase, uppercase, capitalized or none).
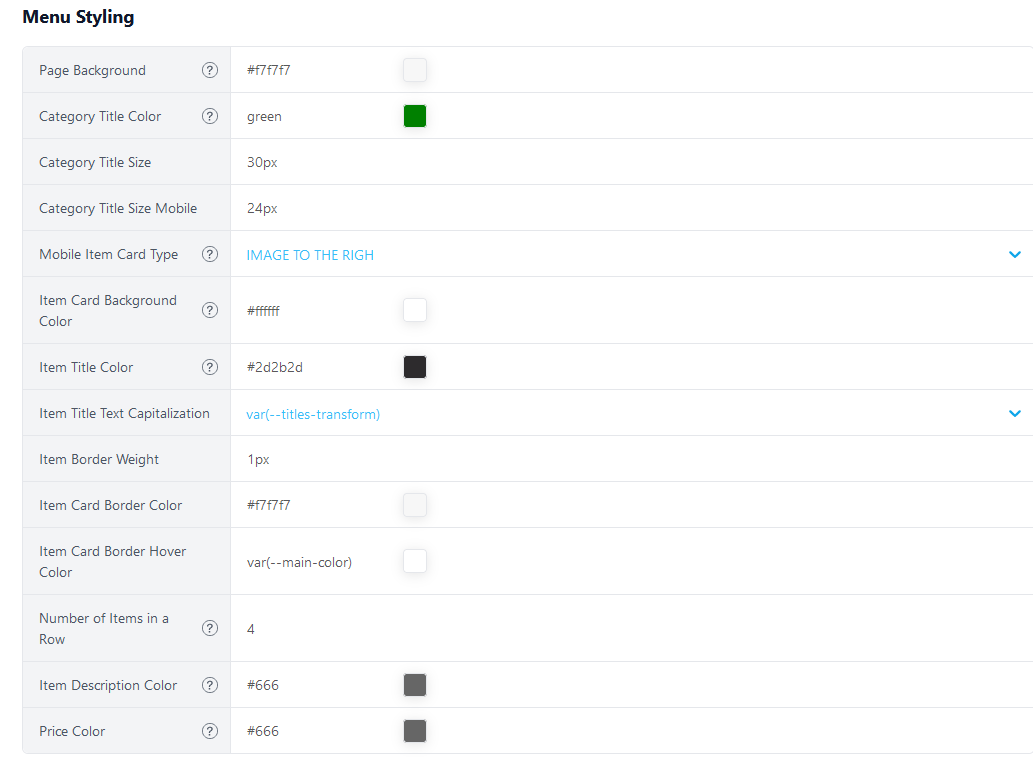
7. Menu Styling
Page background – set the color of the main background of your online store, by applying a hex color code or by using the color picker.
Category Title Color – set the color of your categories title on your front page.
Category Title Size - set the text size for categories on the front page (in pixels).
Category Title Size Mobile - set the text size for categories on the front page for mobile devices (in pixels).
Mobile Item Card Type – set the position of the image in the item card for mobile devices (image to the right, image to the left, image on top). Choose the option from drop-down list.
Item Card Background Color – set the background color of the item card on your front page.
Item Title Color – set the item title color on the item card.
Item Title Text Capitalization - from the drop-down list, set how your text on the item card will look (lowercase, uppercase, capitalized or none).
Item Border Weight – set the item border weight, in pixels.
Item Card Border Color - set the item border color by applying a hex color code or by using the color picker.
Item Card Border Hover Color – set the color of the item card text when you click on it.
Number of Items in a Row – specify the number of items in a row (applicable to the desktop view).
Item Description Color – set text color for product description on the item card.
Price Color – set text color for product price on the item card.
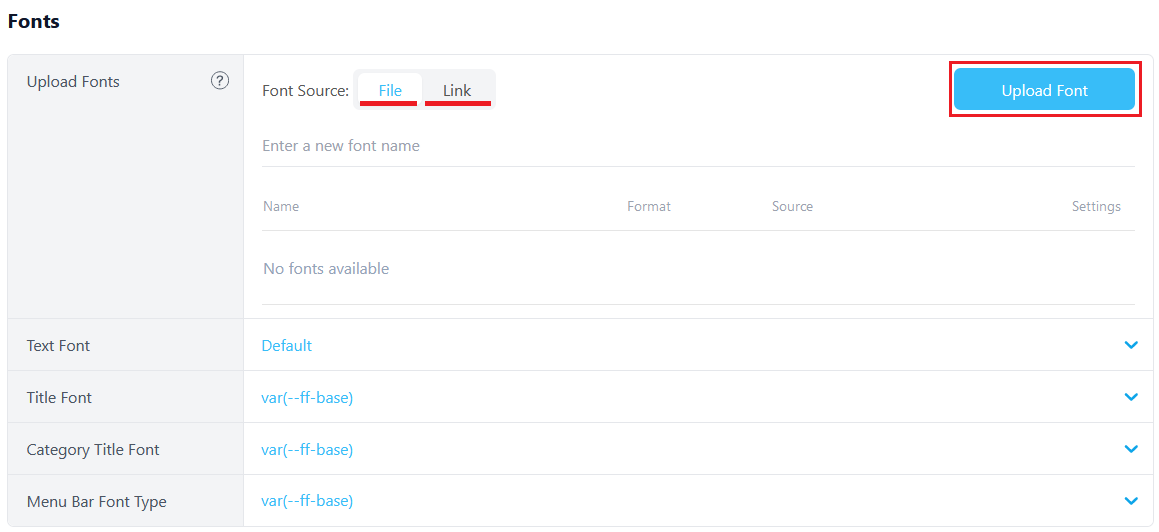
8. Fonts
Select the Fonts you want to use on your online store. This option gives you the possibility to upload your custom fonts via Font File or Font Link. If you want to delete a font from the store, choose the ‘Default’ option from the drop-down list. The uploaded fonts can be used for general text, for titles, for category titles and for menu bar text.
9. Button Settings
Button Background Color – set the background color for Pay Now/ Login/ Add to Cart buttons. Select a hex color code or use the color picker.
Button Background Color Hover - set the color of the button’s background when you hover or click on it.
Text Color – set the color of the text on the button.
Text Color Hover - set the color of the text on the button when you hover or click on it.

10. Footer
Footer Background – set the background color for your footer, by applying a hex color code or by using the color picker.
Footer Text Color - set the color of the text in your footer.
11. Social Media Links
Fill the required fields with the social media profiles of your business. You can link your Instagram, Facebook and Tweeter accounts, as well as your Youtube chanel.

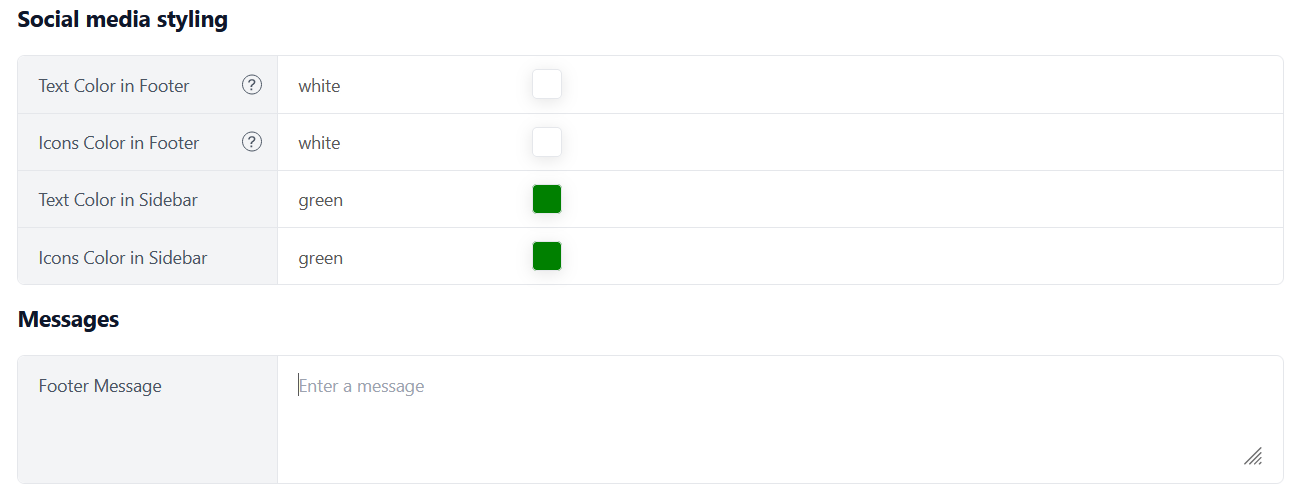
12. Social media styling
Text Color in Footer – set the color of the following text „Follow us on Social”.
Icons Color in Footer - set the social media icons color.
Text Color in Sidebar – set the color of the text „Follow us on Social” in sidebar.
Icons Color in Sidebar – set the social media icons color in sidebar.
13. Messages
Footer Message – you have the possibility to write any text you want and it will be displayed as a Footer Message.
After you configured the styling of your store, make sure to click the 'Save' button in the right corner of your screen.
Examples:
- Header, Main Menu, Item cards
- Favicons
![]()
- Footer, Social Media

Store Integrations#
In order to measure the marketing performance of your business, we also offer you the possibility to integrate into your store various Website Analytics Tools.
Google Tag is a useful tool to manage user data on your website. Google has a list of commonly used tags for you to choose from, which you can integrate in your online store, as well as many other useful features. With Google Tag there are nearly indefinite ways to track activity across your sites and apps. This feature will help you understand in more detail the behavior of your customers.
Facebook Pixels – integration of this tool will help you better understand your audience, maintain your customers and increase your sales, as well as to create ads that promote the items you sell. Once installed, the Facebook pixel gives you important insights into how visitors from Facebook interact with your site.
Click ‘Save’ in the right corner of your screen.

Configurations#
Special Request Field – you can use this option to allow your customers to add notes for each item they order. If you don’t want to get comments in the order, just switch it off.
Currency – choose the currency your business operates with.
Click on 'Save' in the right corner of your screen.
