How to set-up
What is the Loyalty Program?#
In recent years, brands have started building brand love ❤️ as part of their retention strategy. The loyalty feature has a variety of benefits on one hand, but also it has become an expected part of the consumer experience.
Our loyalty program is a points system. Every time a customer makes a purchase, they get a certain amount of points depending on how much they spent. The more your customers spend, the more points they get in return.
As a merchant, you can have several loyalty programs specific to locations, or time periods.
At the same time, the loyalty users will be merchant level, meaning that their points are accumulated on orders from all the stores, and they are able to spend the accumulated points in any store.
How to set it up in your dashboard?#
First, make sure to inform our Support Managers or your account manager that you would like to enable the Loyalty Program for your merchant. Write a message to support@goparrot.ai asking to activate this feature. After receiving the confirmation that you are all set, you can start creating different loyalty rules on the dashboard.
Step 1: Define General Settings#
- Make sure you selected the “Merchant Level”
- Select the “Loyalty” tab from the left-hand menu
- Adjust terminology if necessary (point/points; star/stars)
- Create a new Loyalty program by clicking “+Add”
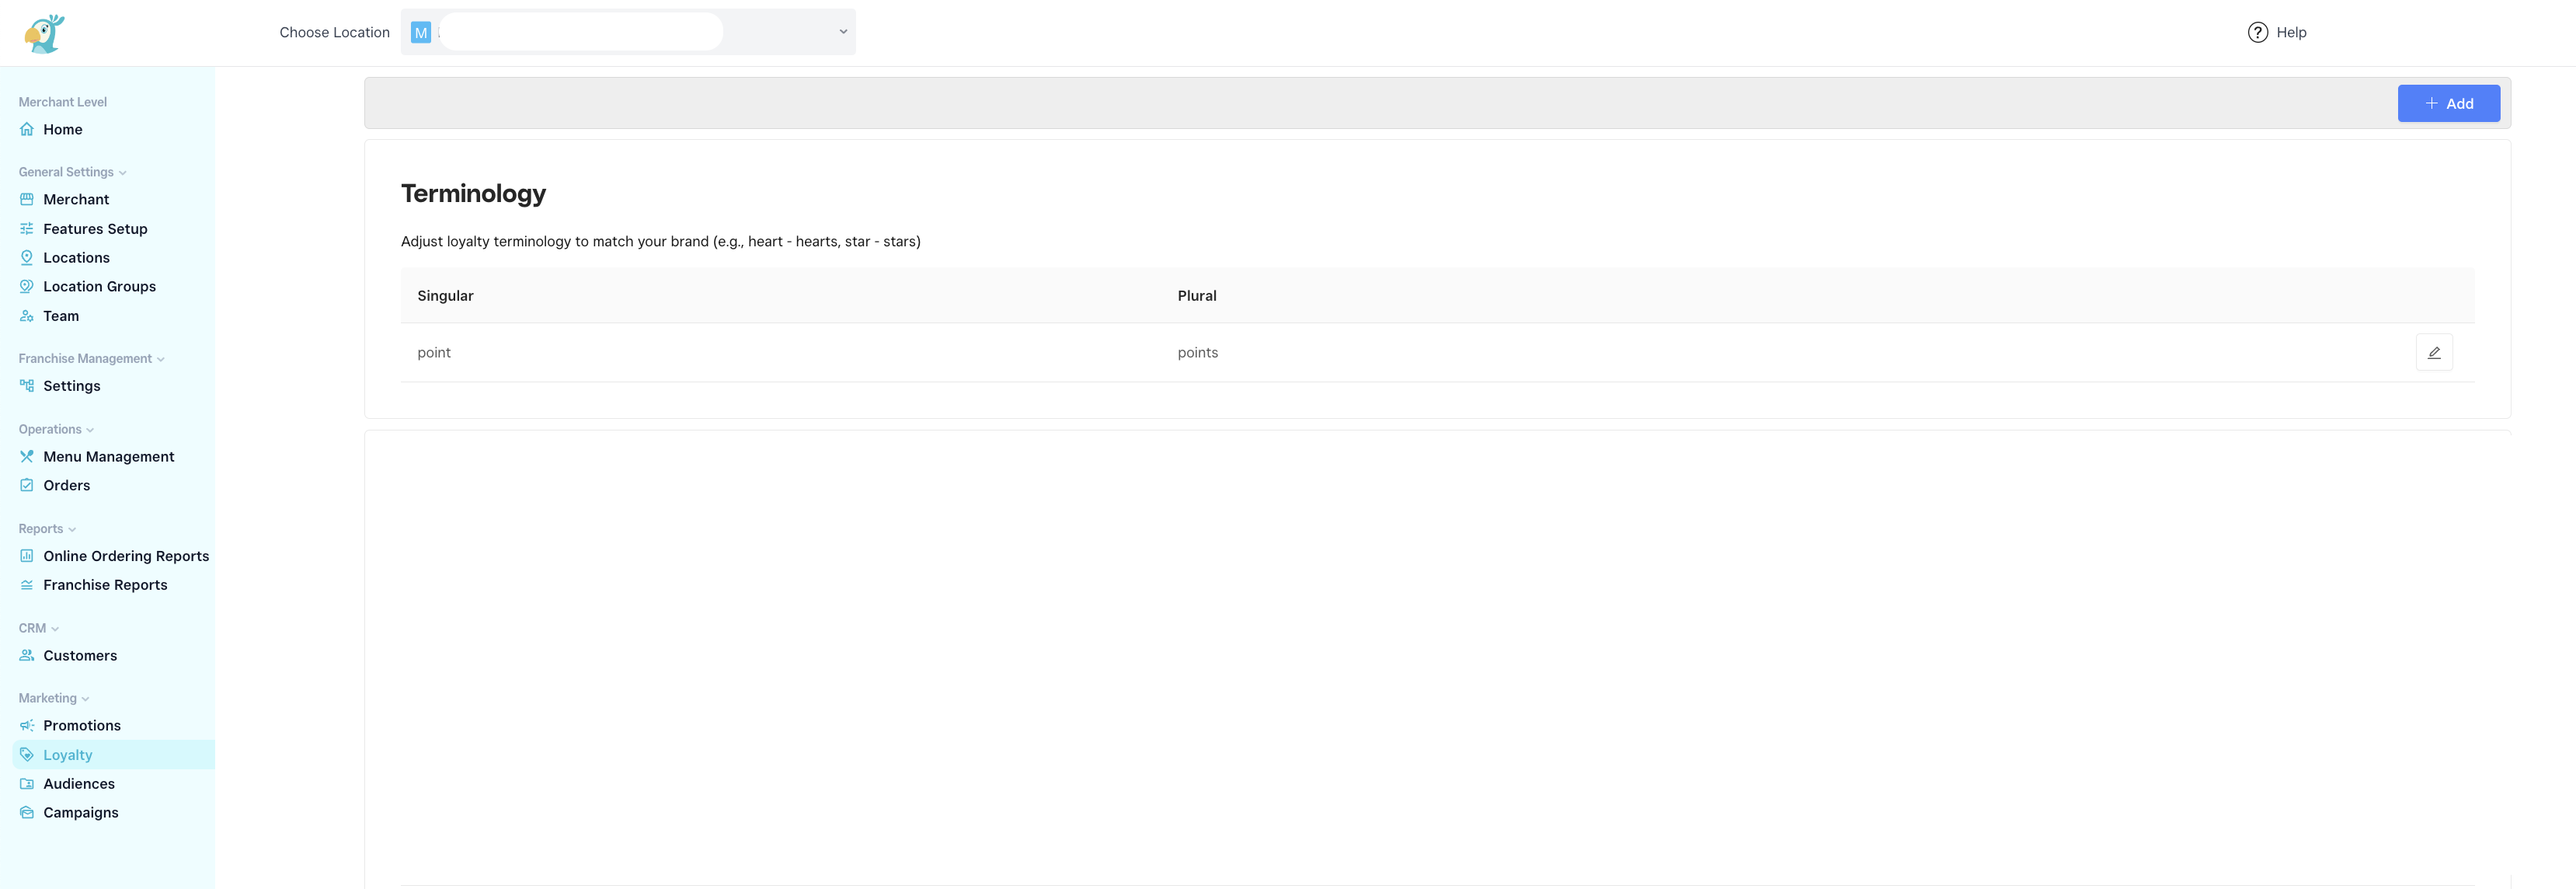
After clicking “+Add” a new page opens where you can activate and personalize the loyalty program.
Enable the toggle to activate the loyalty program;
Set the active period for the program you are creating:
- Unlimited/Always available - leave the date fields empty
- Limit the period by the start date - insert only the Start date and leave the End date empty;
- Limit the period by the end date - add only the End date;
- Specific period - add both the Start and End date that will define it
In the field Locations select the relevant locations:
- If Franchise - only add your Central Location;
- If Regular stores - add all locations/stores that should have the loyalty program visible on their online ordering page.

Step 2: Define the rules for earning points#
The Default Earning Rule
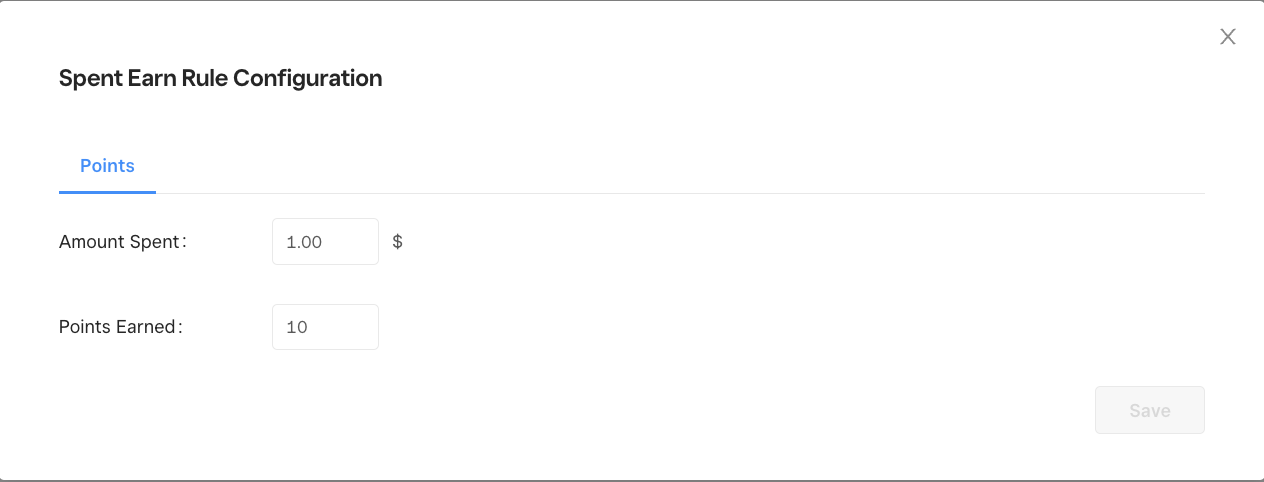
Change the earning rule to match your needs regarding the loyalty program (The default is ‘Earn 1 point for every $1 spent’)
Click on the edit icon next to the rule;
Adjust the "Amount Spent" and "Points Earned"
Non-Default Earning Rule

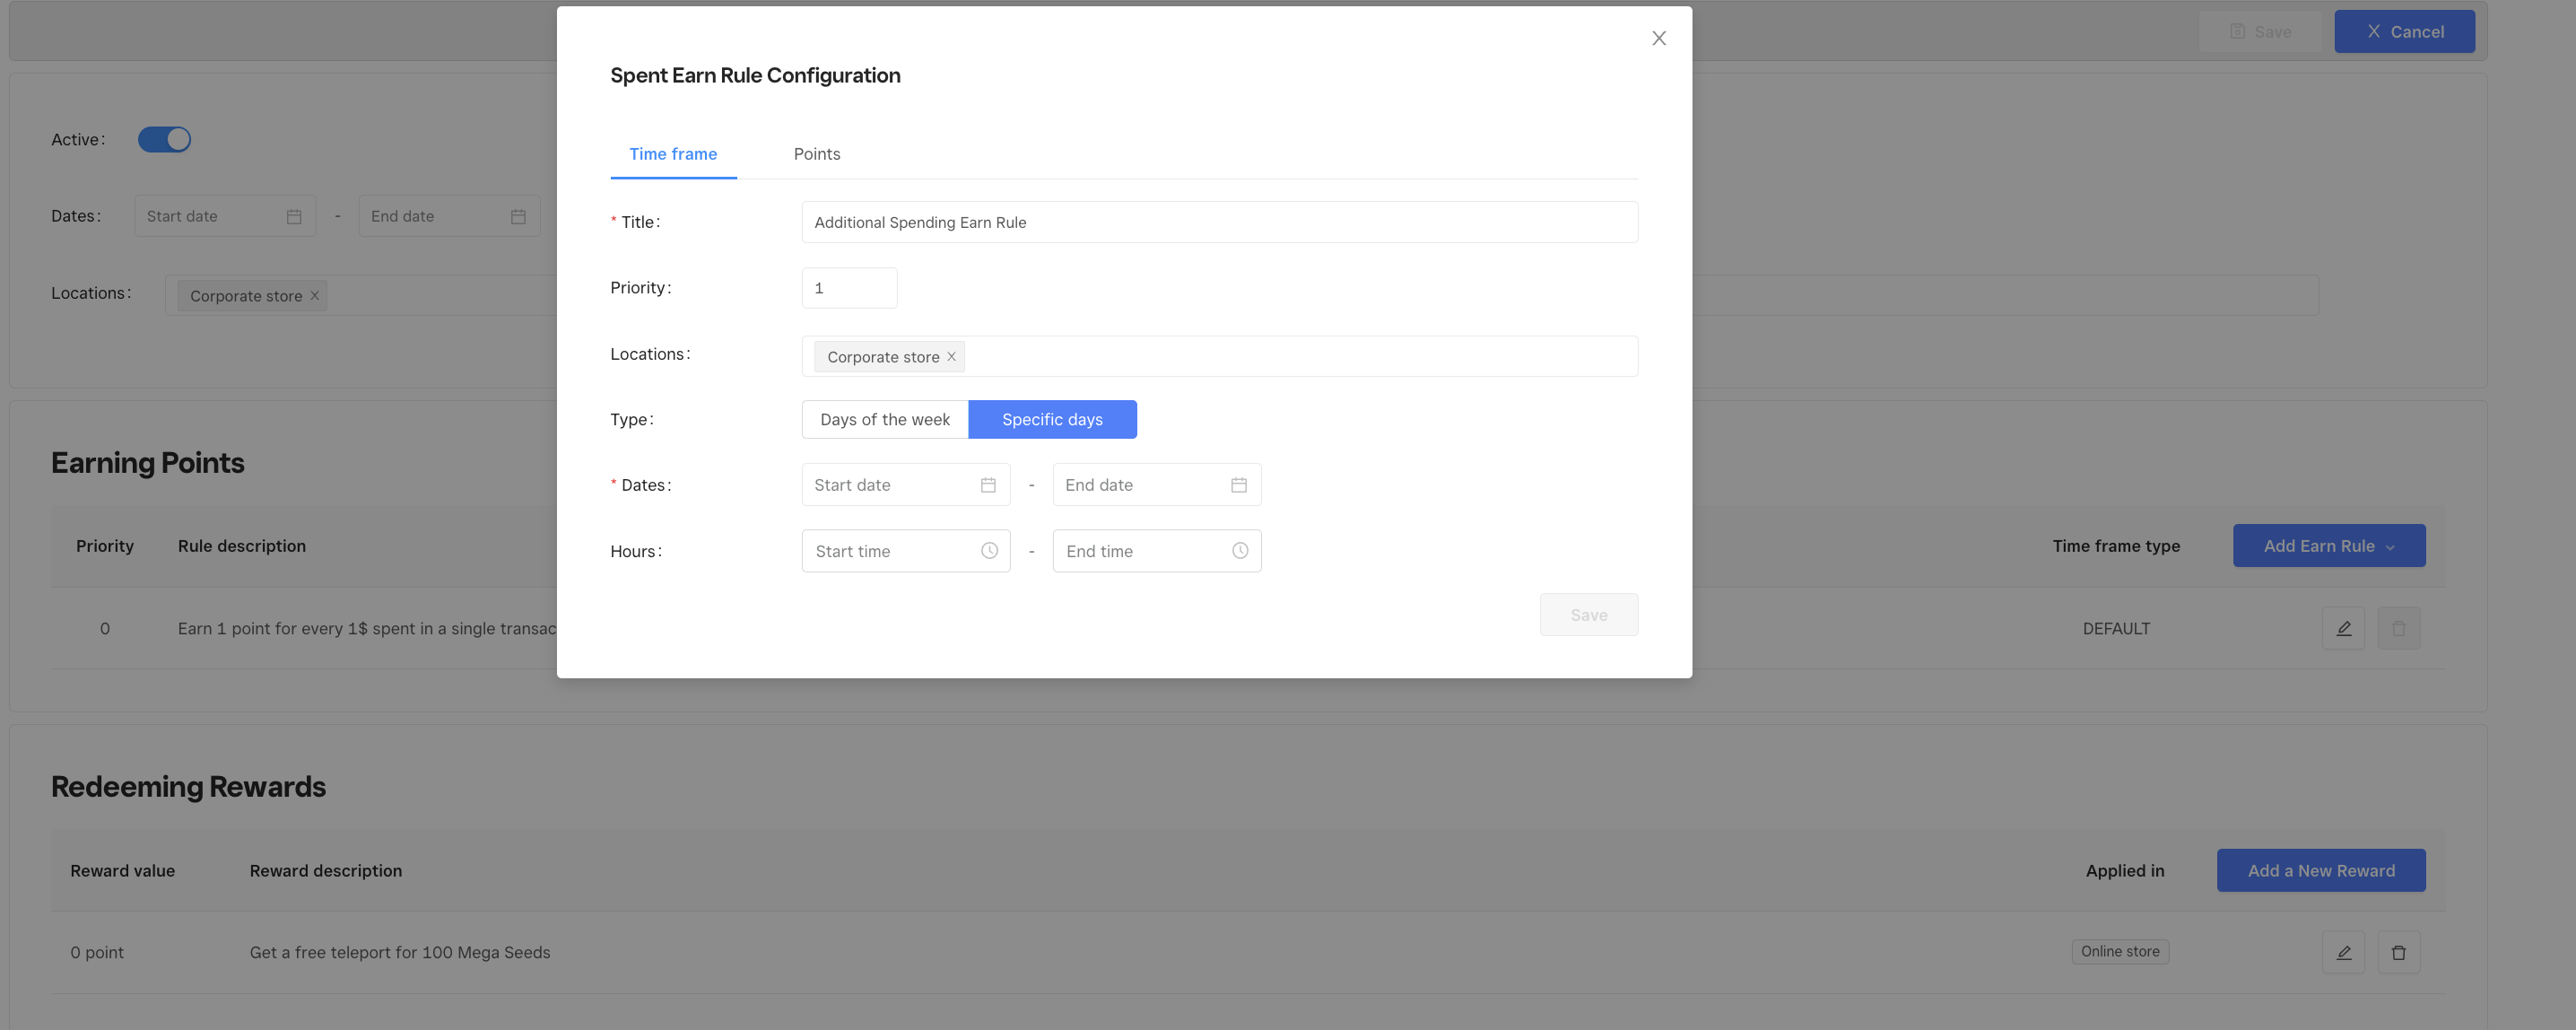
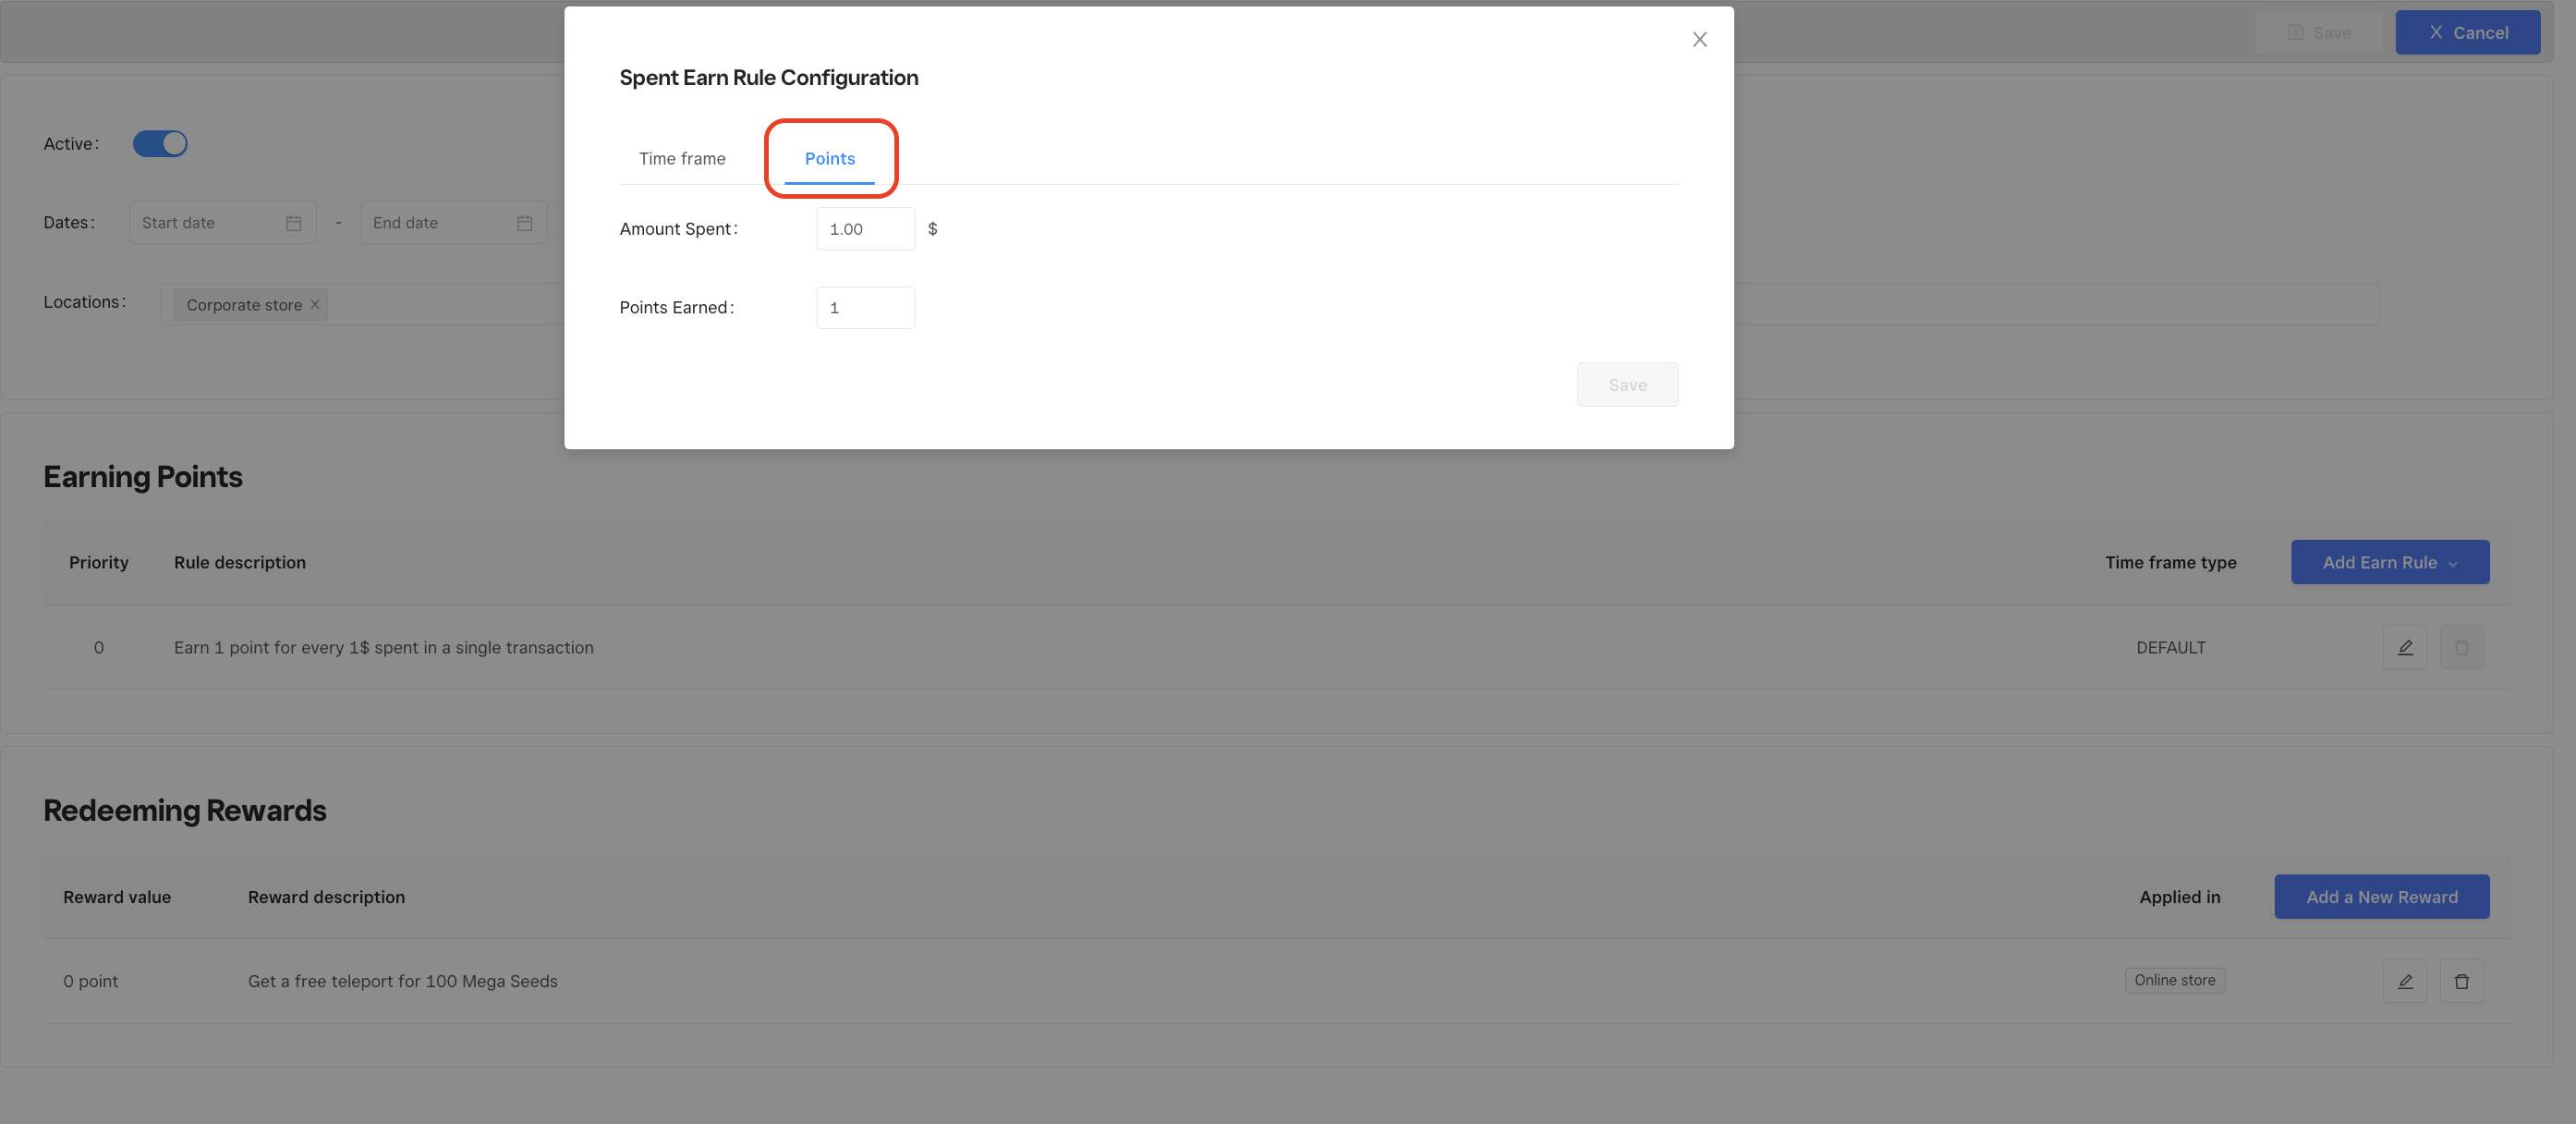
Spent Earning Rule - Setup a rule allowing customers to earn points based on specific days of the week or specific times of the day. \ During the specified period, the new earning rule applies to all orders, thus overriding the default rule. As soon as the specified period ends, the default earning rule applies to all orders.
Click on Add Earn Rule
Select Spent Earn Rule
Setup the timeframe where this rule will override your default rule and the amount of points earned.
Sign-up Earning Rule - Customers can accrue points for signing up on the online ordering page or app.
Click on Add Earn Rule;
Select Signup Earn Rule
Input the amount of ponts earned by a customer upon signing up.

Step 3: How to add rewards?#
You can have as manu rewards as you want: Check Based, Item Based or Category Based. Offer your customers either a percentage or a fixed amount off of your menu or special deals.
Click Add New Reward;
A new window pop-up will appear where you will create and customise your reward:
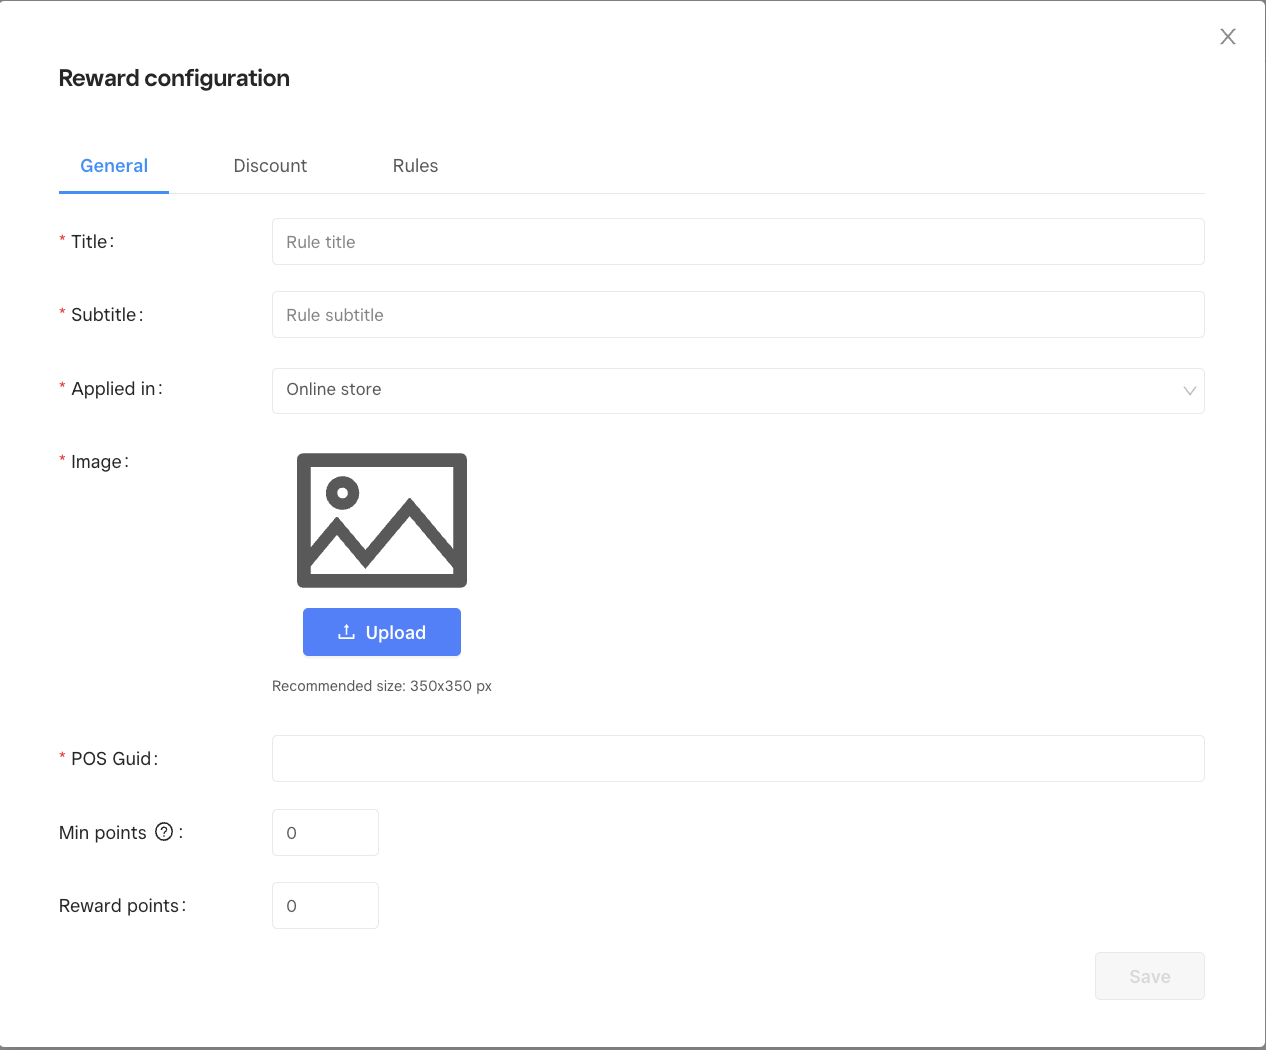
Add the Title of the Reward - This is what your customers will see on the online ordering page, loyalty section. (example: Get a free drink for 10 points);
Add a subtitle - provide more information about the reward;
Applied in Online Store (Franchise)
Upload an image thet represents the reward;
POS GUID:
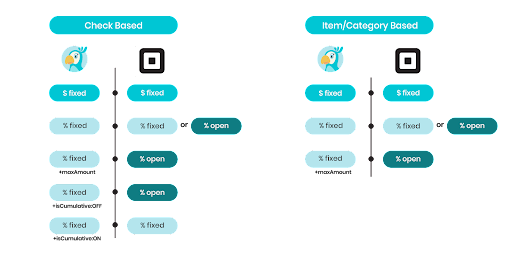
- Log into your Square account;
- Find the Discounts tab and create a discount based on the reward you are offering (following the chart below);
- Copy the discount GUID and paste in the relevant field.
Minimum Points - amount of points a customer should have in their account to be eligible for this reward;
Reward Points - How many points does the customer need to spend to "purchase" this reward;
Move to the Discount tab:
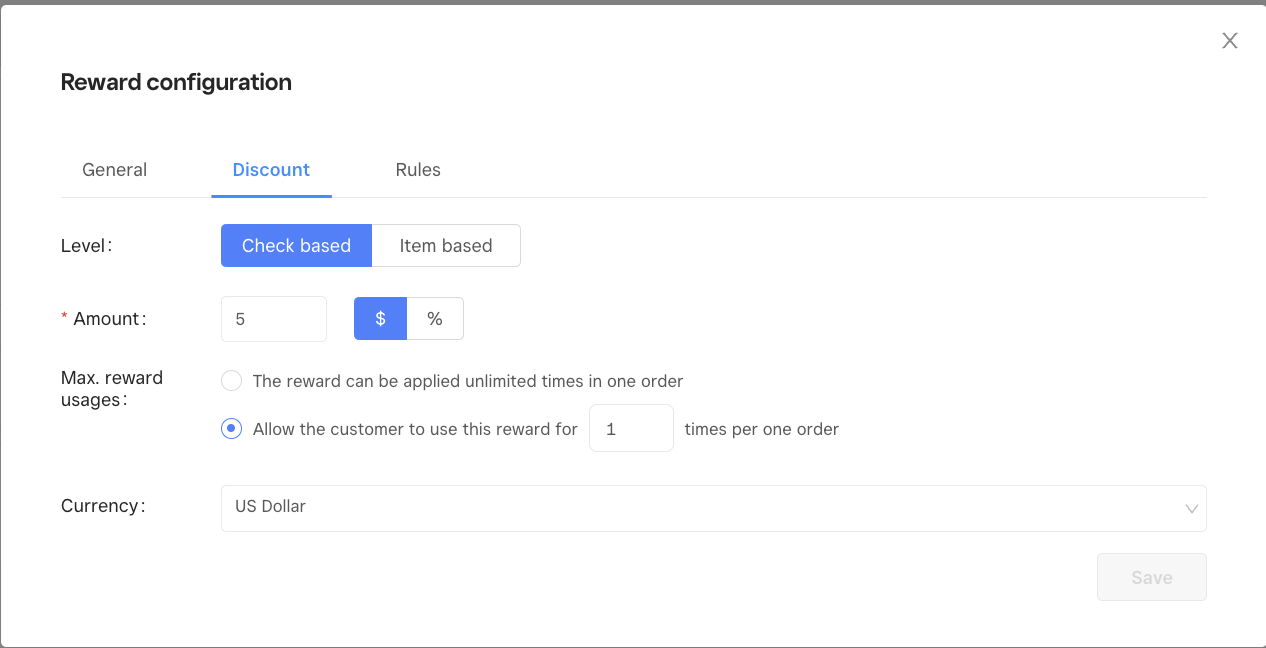
Check Based Rewards
Fixed dollar amount off the check ($)
Define the amount discounted;
Define maximum times the reward can be used on one order;
Define the currency (US/CA/AUD)
Percentage amount off the check (%)
Define the % amount that will be discounted off the check;
Define a maximum amount in $ allowed to be disocunted on this check;
Define currency (US/CA/AUD).
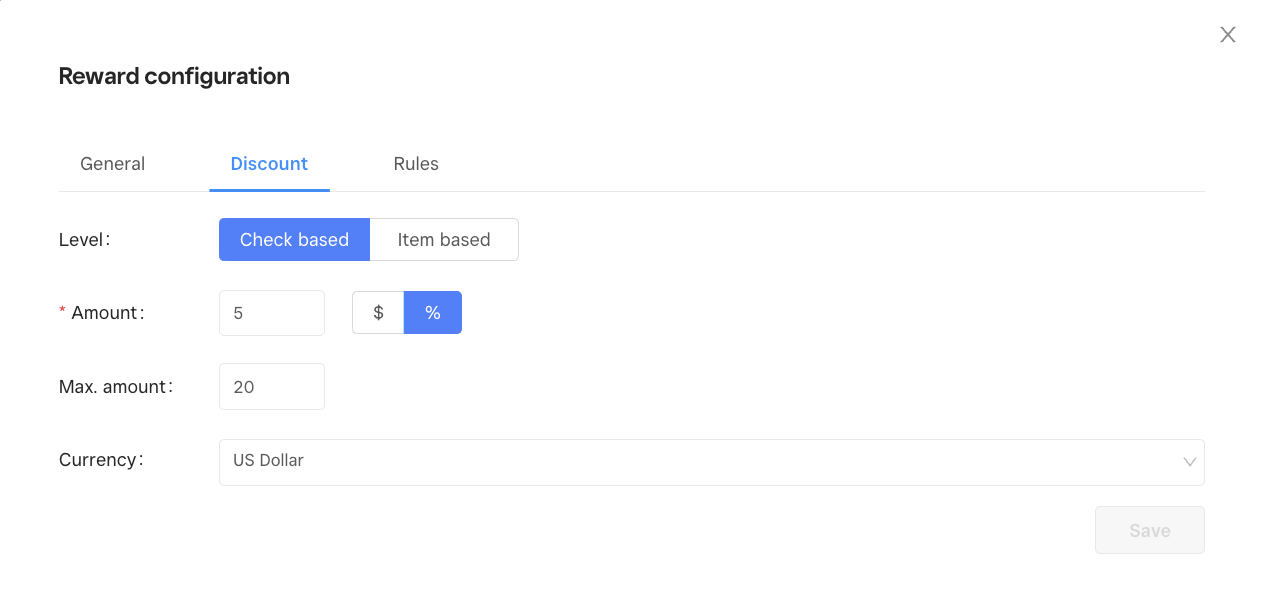
Item Based Rewards
Fixed dollar amount off of an item ($)
Define the amount discounted off of the item;
Define the currency (US/CA/AUD);
Search and select the Item or Category that is offered as a reward.
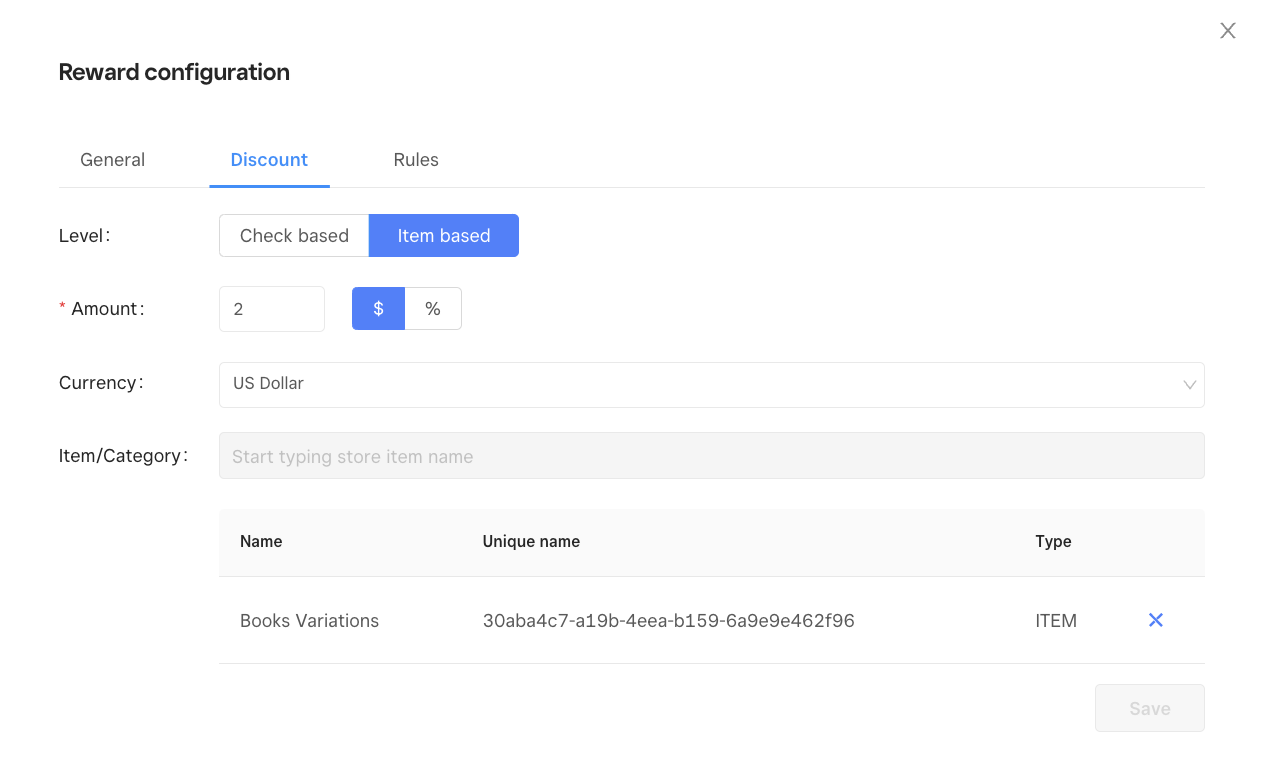
Percentage amount off of an item ($)
Define the % amount that will be discounted off on the item (ex.: 100% off);
Define a maximum amount that will be discounted off of an item;
Define the currency (US/CA/AUD);
Serch and select for the Item or category that is available to be redeemed with this reward;
Define maximum times the reward can be used on one order.
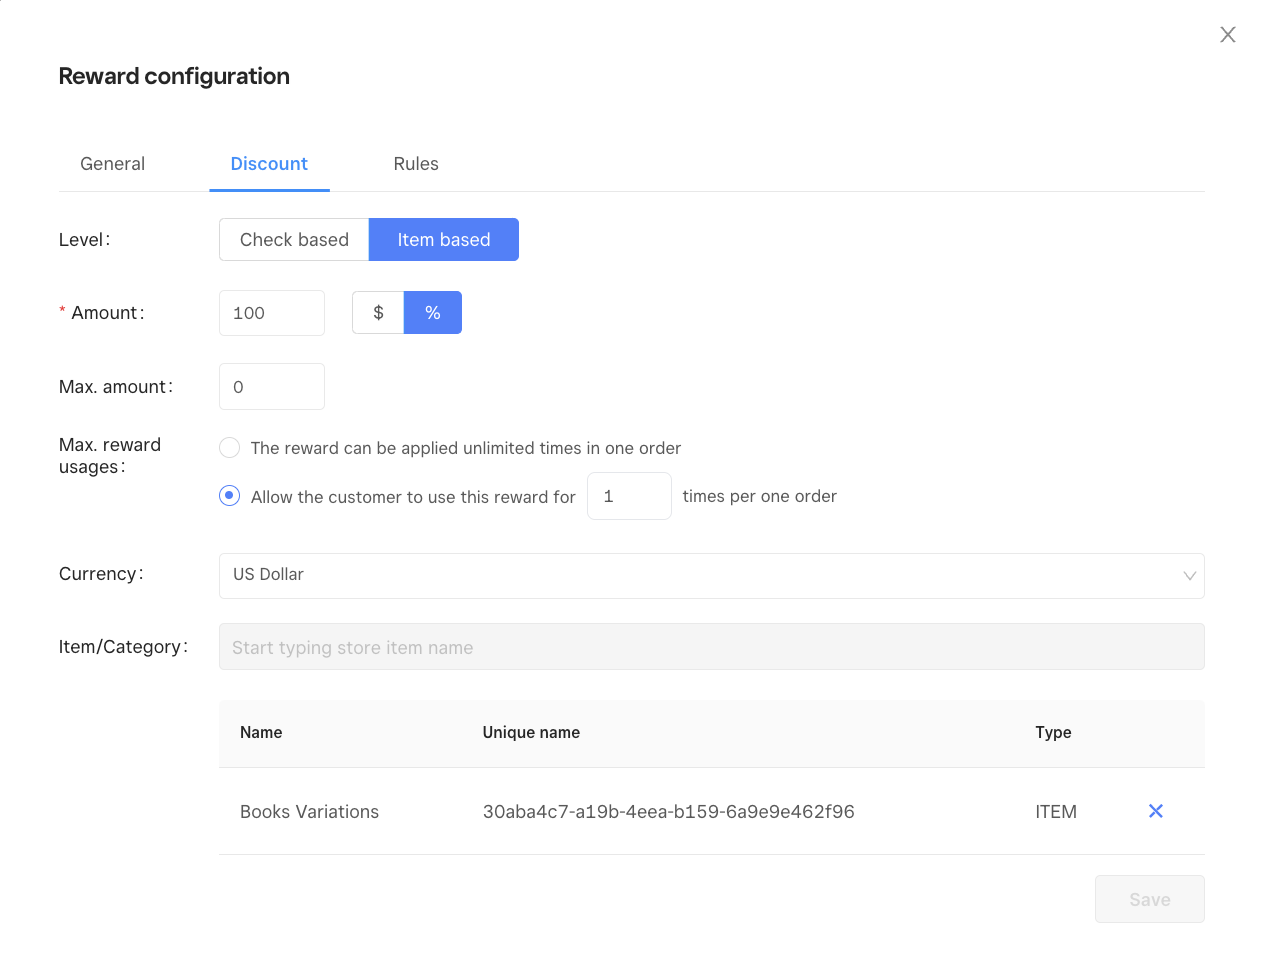
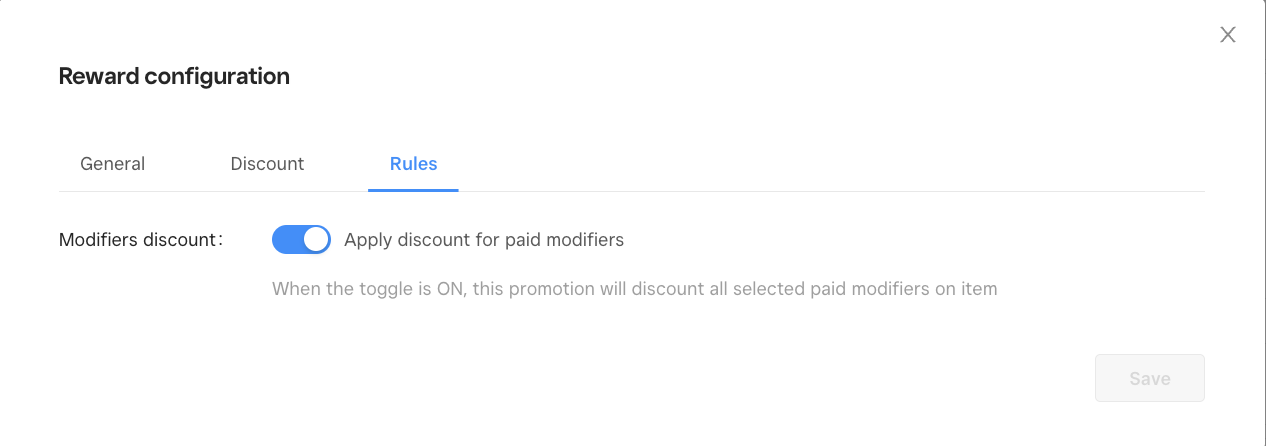
Finally, open the Rules tab:
By default the discount set in the reward settings is applied to all modifiers of the items. If you want the modifiers to be exempt of the discount, the toggle has to be disabled in the Rules tab.\ The discount will be applied only to the base price of the item, or to the base amount of the check excluding the price of the paid modifiers.
